Tag: Mobile Gaming

  • Ludo King: 5 Pro Strategies to Control the Board & Win 4-Player Matches

    Ludo King: 5 Pro Strategies to Control the Board & Win 4-Player Matches

    The Ultimate Ludo King 4-Player Showdown: Why Casual Tactics Fail

    Let’s be real, boss. Ludo King isn’t just a game of rolling a dice and hoping for a six anymore. In 2026, the online 4-player lobbies are absolute warzones. Players are ruthless, alliances are forged and broken in seconds, and if you are still relying on pure luck, you are going to get wiped off the board. Just like securing your Free Fire diamonds or grabbing Mobile Legends diamonds to dominate the battlefield, mastering Ludo King requires the right investment of strategy, focus, and raw gaming IQ.

    Most casual guides tell you the same old recycled advice: “Open all your tokens early” or “Always kill when you get the chance.” But in a high-stakes 4-player match, these generic tips will get you cornered and eliminated. Today, we are breaking down the uradhura, dashing, and rocking strategies used by top-tier players to control the board, manipulate opponents, and secure consistent wins.


    Competitive Gap Analysis: What the Noobs Don’t Tell You

    Standard Ludo King tips completely ignore the psychological and mathematical realities of a 4-player match. Here is what they miss:

    • The Leader Target Trap: If you rush one token ahead, the other three players will collectively target you.
    • Safe Zone Overcrowding: Blindly sitting in a safe zone can trap your tokens, making you a sitting duck once you are forced to move.
    • The Illusion of the Six: Over-focusing on rolling sixes instead of managing the spacing between your active tokens.

    Let’s dive into the 5 advanced strategies that will transform your gameplay from amateur to absolute king of the board.


    1. The Vanguard-Rearguard Split (Token Role Allocation)

    Never treat your four tokens equally. To dominate a 4-player online match, you must assign specific, dynamic roles to your tokens based on their positions on the board.

    The Vanguard (The Runner)

    This is your lead token. Its primary job is to break away from the pack and head towards the home stretch. However, never let the Vanguard run alone if there is an opponent close behind. Use the Vanguard to pressure opponents who are trying to camp near their starting points.

    The Rearguard (The Sweeper & Shield)

    Keep at least two tokens behind to act as your sweepers. These tokens serve two crucial purposes:

    • They protect your Vanguard from being chased down by opponents.
    • They act as a threat, blocking or capturing any opponent tokens that try to slip past your starting zone.

    When it works: This split-role strategy is highly effective when you have rolled an early six and can establish a clear gap between your lead token and the rest of the board.

    The Trade-off: It requires patience. You will sometimes have to pass up a fast run with your Vanguard to move a slower Rearguard token into a defensive blocking position.


    2. Safe Zone Camping & Quadrant Control

    Safe zones (the stars and starting points) are your greatest strategic assets. But camping on them indefinitely is a rookie mistake. You must master Quadrant Control.

    The Ludo King board is divided into four quadrants. Your goal is to control the transition zones—the spaces right before and after safe zones.

    How to Execute Quadrant Control:

    • The Star Trap: Position a token exactly 1 to 5 steps behind an opponent’s camped token on a star. This creates an immediate threat zone. The moment they step off the star, you have a high probability of capturing them.
    • Double Token Block: If you manage to get two of your tokens on the same tile (in classic rules where blocks are enabled), you can completely shut down a quadrant, forcing your opponents to waste their moves or take risky alternative routes.

    If you love winning big and controlling the game, check out our VIP Offers for exclusive gaming deals that match your elite playstyle.


    3. The Bait and Bash (The Ultimate Mind Game)

    In 4-player online matches, players are greedy. They will often risk their own safety for an easy kill. You can exploit this psychological flaw using the Bait and Bash tactic.

    This strategy involves deliberately leaving one of your tokens vulnerable to bait an opponent into moving their token out of a safe zone or a highly defensive position.

    The Setup:

    1. Identify an opponent token that is currently safe but blocking your path.
    2. Expose one of your Rearguard tokens, placing it within 3 to 5 steps of their reach.
    3. Once they take the bait and step out to capture your token, use your second Rearguard token (which you strategically positioned beforehand) to instantly capture them on your next turn.

    Risks: If you roll poorly on your turn, the bait token is lost for nothing. Only use this tactic when you have a secondary token within a high-probability rolling distance (1, 2, or 3 steps) of the bait zone.


    4. The Target Shifting Tactic (Diplomacy without Words)

    In a 4-player match, you are not just playing against the board; you are playing against three human minds. You must direct the aggression away from yourself.

    • Stay in Third Place Early: Let two other players fight fiercely for the lead. When they occupy themselves killing each other’s tokens, quietly advance your tokens into strategic safe zones.
    • The “No-Kill” Truce: If you are positioned directly behind a player who is actively chasing the current match leader, do not kill them. Let them do the dirty work of eliminating the leader, then clean up the remains.

    Just like managing your resources in PUBG Mobile, knowing when to engage and when to retreat makes the difference between a quick exit and a chicken dinner.


    5. Dice Roll Probability & Pathing Optimization

    Ludo King is built on a digital random number generator (RNG), but probability still applies. Professional players calculate risk based on the likelihood of specific numbers being rolled.

    Distance to Target (Tiles) Kill Probability (Single Dice) Strategic Action
    1 to 4 Tiles High (Approx. 16.6% per specific number) Attack immediately; highly likely to hit.
    5 to 6 Tiles Medium Safe to bait, but do not rely on a guaranteed hit.
    7+ Tiles Low (Requires combinations or multiple turns) Advance defensively; focus on positioning rather than attacking.

    The Golden Rule of Pathing: If you have a choice between moving a token that is 2 steps away from safety or one that is 10 steps away, always prioritize moving the token closest to safety unless you have an active, high-value kill opportunity.


    Pro-Level Troubleshooting: What to Do When Everything Goes Wrong

    Even with the best strategy, the dice can betray you. Here is how to recover from a worst-case scenario:

    Scenario: All your tokens are sent back to the starting yard.

    Do not panic. This is actually an opportunity to reset your strategy. When you are far behind, the other players will stop viewing you as a threat. They will focus on fighting each other. Use this window to quietly build up a defensive wall of tokens near your starting zone and wait for them to bring their winning tokens past your gate, where you can strike them down with high-probability home-court advantage.


    Frequently Asked Questions (FAQ)

    What is the best starting strategy in Ludo King?

    The best starting strategy is to get at least two tokens out of the yard as quickly as possible. Do not run ahead with just one token; keep them close together to support each other and create defensive blocks.

    Should I always kill an opponent’s token if I get the chance?

    No. Only kill if it benefits your board position or eliminates a direct threat to your lead token. Killing an opponent just because you can often leaves your own token vulnerable to being captured by the other two players.

    How do I counter players who team up in 4-player online matches?

    If you notice two players collaborating, play extremely defensively. Camp on safe zones and let them overextend. Eventually, they will have to move past each other, forcing them to break their alliance or leave themselves open to your counter-attacks.


    Featured Snippet Answer

    How do you win every 4-player Ludo King match? To win consistently, assign specific roles to your tokens (Vanguard to run, Rearguard to defend), maintain control of the tiles immediately surrounding safe zones, bait opponents into leaving their defensive positions, and focus on token positioning rather than chasing low-probability kills.

  • COD Mobile: 5 Pro Movement Techniques to Win 1v1 Gunfights

    COD Mobile: 5 Pro Movement Techniques to Win 1v1 Gunfights

    Mastering the 2026 CODM Movement Meta

    Let’s be real—if you are still running in straight lines and hoping your aim assist does all the work, you are absolute lobby food in 2026. With the current ultra-fast-paced Call of Duty: Mobile meta, raw aiming skill only gets you halfway. To consistently clear out legendary ranked lobbies, you need to break your opponent’s camera, force them to whiff their shots, and slide-cancel your way to victory. This is pure uradhura level action, guys!

    In this guide, we are diving deep into the exact physical mechanics, joystick inputs, and tactical trade-offs of the top 5 movement techniques used by global-tier pros. If you are also dominating other mobile battlefields, don’t forget to grab your top-ups! Check out our PUBG Mobile UC for epic skins, or grab some Mobile Legends Diamonds to rule the Land of Dawn. For the ultimate discounts, hit up our VIP Offers.


    1. The Camera-Breaking Slide Cancel (The 10-to-2 Joystick Method)

    Most players think slide-canceling is just tapping slide and jump in rapid succession. That is a massive misconception. If you slide straight forward, your hitbox remains predictable, and the enemy’s aim assist will track you effortlessly. To actually break their camera, you must utilize the 10-to-2 joystick rotation.

    How It Works:

    • Sprint forward to build maximum velocity.
    • Flick your movement joystick to the 10 o’clock position (diagonally left) and immediately tap slide.
    • Mid-slide, rapidly flick the joystick to the 2 o’clock position (diagonally right) and tap your jump/crouch button to cancel.

    Why It Works:

    CODM’s server tick rate cannot process instantaneous diagonal direction changes perfectly. By shifting your momentum diagonally while sliding, your character model literally teleports a few frames ahead on the enemy’s screen compared to where they are aiming. This completely breaks their crosshair placement.

    Risks & Trade-offs:

    If you cancel too early, you enter a crouch state, which slashes your movement speed by 60% and makes you an incredibly easy target. Only use this when turning sharp corners or when pushing an enemy holding a head-glitch.


    2. The Fast-Strafe “S-Curve” (The AR Killer)

    Strafing is the act of moving side-to-side during a gunfight. However, simple left-right strafing is incredibly easy to counter in 2026 due to improved weapon attachments that boost lateral sprint speed. The pro alternative is the S-Curve Strafe.

    How It Works:

    • Equip a stock that prioritizes ADS Movement Speed (like the Light Stock).
    • Instead of moving flatly left and right, drag your joystick in a continuous, tight ‘S’ pattern (semi-circular loops).
    • Keep your crosshair locked on the enemy’s chest while your character moves in a 3D looping pattern.

    Why It Works:

    This movement pattern forces the enemy to adjust both their horizontal and vertical tracking simultaneously. It is especially lethal against Assault Rifle users who have slower ADS tracking speeds.

    Movement Type Tracking Difficulty for Enemy Your ADS Accuracy Penalty
    Standard Strafe Low-Medium None
    S-Curve Strafe Extremely High Minimal (Requires Practice)
    Panic Jumping Low (Predictable Arc) High Bloom

    3. The Advanced Drop-Slide (The Panic Button)

    The old-school dropshot (going prone mid-fight) is dead. In high-tier rank, players expect it and will naturally get free headshots as your head drops into their crosshairs. The Drop-Slide is the evolutionary upgrade.

    How It Works:

    • While sliding sideways, tap and hold your prone button instead of jumping.
    • Your character will slide along the floor while transitioning directly into a prone position, carrying the slide’s momentum.

    Why It Works:

    Unlike a normal dropshot which keeps you stationary, the Drop-Slide keeps your hitbox moving horizontally across the floor while you go prone. It completely throws off the enemy’s vertical recoil control.

    When NOT to Use It:

    Do not use this in open fields against multiple enemies. Once you are prone, your mobility drops to zero. If you don’t secure the kill within the first 10 bullets, you are a sitting duck.


    4. The Edge-Boost Slide (Velocity Multiplier)

    Did you know you can manipulate CODM’s physics engine to gain a massive speed boost? The Edge-Boost Slide uses map geometry to propel you forward at double the normal slide speed.

    How It Works:

    • Locate any slight elevation—stairs, small ramps, boxes, or even curbs.
    • Sprint toward the edge of the drop-off.
    • Tap slide exactly one frame before your character’s feet leave the elevated edge.

    Why It Works:

    The game engine combines your downward gravitational acceleration with your horizontal slide velocity, launching you forward in a super-glide. It is the single best way to escape a losing 1v1 or surprise an enemy who thinks they have you pinned.


    5. The Gung-Ho Hip-Fire Glide

    This technique is specifically designed for SMG and Shotgun players who want to maintain absolute mobility while outputting massive damage.

    How It Works:

    • Equip the Gung-Ho green perk (allows you to reload and fire while sprinting).
    • Instead of aiming down sights (ADS), utilize hip-fire while continuously sliding in a circle around your target.

    Why It Works:

    Without the ADS penalty slowing you down, your movement speed remains at 100%. Combined with a high-mobility SMG build, you can literally run circles around an ADS-locked opponent before they can even turn their camera sensitivity to match your speed.


    Pro Settings for God-Tier Movement

    You cannot execute these pro moves with default settings. Go to your controls and change these immediately:

    • Quick Run (Prone): Turn this ON. It reduces the delay when transitioning from prone to sprint.
    • Slide Trigger: Set to “Tap Crouch while Sprinting”. Do not use the hold option.
    • Camera Sensitivity: Ensure your Standard Sensitivity is high enough to allow a 180-degree turn with a single swipe of your thumb.

    Now get out there, customize your HUD, practice these frame-perfect movements in the training grounds, and start wiping squads like a true legend. Stay rocking, stay dashing, and keep dominating!

  • Clash Royale: 5 Pro Elixir Management Tips to Win

    Clash Royale: 5 Pro Elixir Management Tips to Win

    Mastering the Pink Juice: The Ultimate Elixir Guide for Trophy Road Dominance

    Let’s be real for a second. How many times have you built a massive, unstoppable-looking push, only to watch it get completely vaporized by a well-placed defensive structure and a cheap cycle card, leaving you sitting at zero elixir while a Hog Rider tears down your princess tower?

    It hurts. We’ve all been there. In the fast-paced, high-stakes meta of 2026—featuring double Evolution slots and specialized Tower Troops like the Cannoneer and Dagger Duchess—climbing Trophy Road isn’t just about playing the strongest cards. It’s about elixir efficiency. If you don’t control the elixir flow, your opponent controls you.

    Whether you’re grinding here or taking a break to top up your Mobile Legends Diamonds, mastering resources is the absolute key to mobile gaming dominance. Today, we are breaking down 5 pro-level elixir management tips that will turn you from a casual spammer into an absolute tactical mastermind.

    1. The “Passive Leak” Myth & the 0.5-Second Rule

    We’ve all heard the basic advice: “Never leak elixir at 10!” While this is fundamentally true, amateur players often panic-drop a card the millisecond they hit 10 elixir. This is a massive mistake.

    Pro players practice what we call the 0.5-Second Rule. When you reach 10 elixir, you actually have a tiny window where you can let the elixir bar sit full for a fraction of a second. Why?

    • Information Gathering: It forces your opponent to make the first move, giving you the counter-play advantage.
    • Spell Baiting: If they drop a card behind their King’s Tower, you immediately know their starting hand limits.
    • Tempo Control: Dropping your card at exactly 10.5 elixir (just as the bar begins to overflow) ensures you maximize your reaction time without actually losing a full drop of elixir.

    The Trade-off: If you are playing a heavy Beatdown deck (like Golem or Electro Giant), leaking half a drop of elixir is completely fine if it means you get to drop your tank safely. If you are playing a fast Cycle deck, however, leaking even half a drop can ruin your defense rotation. Know your deck’s archetype!

    2. Trading Tower HP for Elixir Profit (The Calculated Sacrifice)

    One of the hardest habits for mid-ladder players to break is the urge to defend everything. If your opponent sends a lone Goblin Gang or a half-dead Musketeer at your tower, your instinct might be to drop a defensive card immediately.

    Don’t do it.

    A pro player looks at their tower health as a spendable resource. If you let a stray troop deal 400 damage to your tower, but you save 3 elixir in the process, you have just bought a massive macro-advantage.

    Scenario Your Action Tower HP Lost Elixir Advantage Gained
    Lone Baby Dragon at half HP Ignore completely ~350 HP +4 Elixir
    Goblin Barrel (no log in hand) Defend with Skarmy (late) ~200 HP 0 Elixir (Equal trade)
    Lone Bandit dash Ignore / Let Tower take it ~320 HP +3 Elixir

    By saving that elixir, you can launch an overwhelming counter-push in the opposite lane that your opponent cannot afford to defend. Just ensure you aren’t trading tower health against decks with high spell-cycle potential (like Rocket or Fireball cycle), or you’ll find yourself spell-spammed to death in overtime!

    3. Track the “4-Card Cycle” Instead of Counting Elixir

    Trying to count your opponent’s exact elixir in your head while dodging Evolutions and micro-managing placements is exhausting. Instead, use the 4-Card Cycle Rule.

    In Clash Royale, a player must play exactly 4 cards to get back to any specific card in their deck.

    1. Identify your opponent’s primary counter to your win condition (e.g., their Tesla or Log).
    2. Once they play that card, count their next 4 card deployments.
    3. The moment they play their 4th card, you know their counter is back in their hand.

    If you know their counter is out of hand and they spent heavily in the other lane, go all-in. They physically cannot stop your win condition without overspending on inefficient defensive cards, handing you an immediate crown.

    4. Punishing the Evolution Cycle (The 2026 Meta Special)

    With the 2026 meta allowing multiple Evolution slots, keeping track of your opponent’s dark elixir cycles is crucial. Evolution cards (like evolved Royal Giant or evolved Bomber) provide insane value for their base elixir cost.

    To counter this, you must bait their Evolution cards when they are low on supporting elixir.

    • The Bait: Place a moderate threat in one lane to force out their evolved card.
    • The Pivot: Once they drop the Evolution card, do not overcommit to defending it. Use a cheap stall card (like Ice Spirit or Skeletons) and immediately launch your primary attack in the *opposite* lane.
    • The Result: They spent their highly valuable Evolution card but have no elixir left to support it, while your primary push threatens their other tower.

    If you’re looking to elevate your entire gaming experience across multiple platforms, checking out premium VIP Offers can give you the edge you need to stay ahead of the meta curves.

    5. Master the Pocket Drop and Lane Pressure Splits

    When one tower is down, the game changes completely. The “pocket” (the space in the middle of your opponent’s side of the board) becomes the ultimate tactical drop zone.

    Many players drop high-elixir troops directly into the pocket immediately after taking a tower. This is highly risky. If your opponent has a tank killer ready, you have just wasted 5+ elixir.

    Instead, use Split-Lane Pressure. Drop split-units (like Royal Recruits or Three Musketeers) at the back. This forces your opponent to split their elixir defense. Once they commit their high-cost defense to one side, you drop your pocket pressure on the *other* side. This guarantees they will be caught off-guard, low on elixir, and unable to defend both lanes effectively.

    Frequently Asked Questions (FAQ)

    How do I know if I am up or down on Elixir?

    Look at the field. If you defended a 5-elixir push using only 3 elixir worth of troops, and your troops are still alive and moving forward, you are mathematically up by at least 2 elixir plus the value of your counter-pushing troops.

    Should I always wait for 10 Elixir to start the match?

    Generally, yes. Starting a match with a high-cost card at 4 elixir leaves you completely defenseless against a fast rush in the opposite lane. Always wait to see what your opponent does or play a low-risk 1-2 elixir cycle card at the back once you hit 10.

    Does Tower Troop selection affect Elixir management?

    Absolutely. If you use the Cannoneer, you have high single-target damage but struggle against swarms. You must keep cheap splash cards (like Zap or Log) ready in your hand, meaning you need to maintain a slightly higher elixir reserve than players using the classic Princess Tower.

    Featured Snippet Answer

    What is the best way to manage Elixir in Clash Royale?
    The best way to manage elixir is to focus on positive elixir trades (defending high-cost cards with low-cost counters), tracking your opponent’s 4-card rotation cycle, and strategically trading tower health (HP) for elixir advantages. Avoid panic-dropping cards the moment you reach 10 elixir, and always keep enough elixir reserves to counter-play your opponent’s evolution cards.

  • Master 8 Ball Pool: Table Control & 3-Shot Planning

    Master 8 Ball Pool: Table Control & 3-Shot Planning

    Introduction: Stop Potting, Start Controlling

    Yo, what’s up pool sharks and mobile gaming legends! Are you tired of potting three or four epic shots in a row, only to find yourself snookered behind your opponent’s balls? That’s because you’re playing checkers while the pros are playing chess. In 2026, the 8 Ball Pool meta is faster, sharper, and absolutely ruthless. If you want to rule high-stakes tables like Berlin, Venice, or Rome, casual potting won’t cut it. You need uradhura table control and the ability to plan three shots ahead.

    Whether you are a tactical mastermind who loves optimizing setups (just like planning your squad rotations in battle royales with a Free Fire Diamond Top Up Bangladesh) or a classic pool enthusiast, this guide is your ticket to clean table runouts. Let’s dive into the core mechanics of table domination!

    1. The Physics of the Miniclip Engine: The 90-Degree Rule & Cue Spin

    To control the table, you must control the white cue ball. Many players think they can just ‘feel’ where the ball will go. But the Miniclip engine runs on specific, predictable physics. If you don’t master these two rules, you’re playing on pure luck.

    The Tangent Line (The 90-Degree Rule)

    When the cue ball hits an object ball at an angle, the cue ball will naturally travel along a 90-degree angle from the contact point—if no spin is applied. This is your baseline. Before you touch the spin ball generator, visualize this 90-degree line. It tells you where the cue ball will go by default.

    Modifying the Path with Spin

    • Top Spin (Follow): Forces the cue ball to bend forward of the natural tangent line. Use this to chase an object ball down the table.
    • Backspin (Draw): Pulls the cue ball back, behind the tangent line. Perfect for stopping the cue ball short or pulling it away from a pocket to avoid a scratch.
    • Sidespin (English): Does NOT change the initial angle of the cue ball dramatically until it hits a cushion. Once it strikes a rail, sidespin alters the reflection angle. Use left spin to make it bounce wider left, and right spin to go wider right.

    The Expert Trade-Off: High spin reduces your aiming accuracy. In 8 Ball Pool, applying maximum spin slightly shifts the cue ball’s path right at the launch (known as cue deflection). If you’re playing a long-distance shot, minimize spin to ensure the pot, or compensate by aiming slightly off-center.

    2. The 3-Shot Planning Framework: The ‘Next-Next-Next’ Formula

    If you only think about the ball you are currently shooting, you are already losing. Top-tier players use the 3-Shot Planning Framework. Every time you step up to the table, your brain must process three distinct phases:

    Phase 1: The Pot (Shot A)

    This is your immediate shot. The goal here isn’t just to make the ball go into the pocket; it’s to pocket it with the exact power and angle needed to guide the cue ball to the Target Zone for your next shot.

    Phase 2: The Transition (Shot B)

    This is the bridge. Shot B is usually the shot that opens up the table. It might be used to break a cluster, clear an awkward rail ball, or simply reposition the cue ball to the center of the table. If you don’t have a clear path to Shot B, your runout dies here.

    Phase 3: The Payoff (Shot C)

    This is where you set up your key ball or the final 8-ball. By visualizing Shot C before you even hit Shot A, you ensure that you never end up straight-lined (having no angle) on your final shots.

    Pro Tip: Just like planning your next tactical drop in Free Fire with a Free Fire Level Up Pass, consistency in planning yields massive rewards. Never hit the cue ball without knowing exactly where it will rest for the subsequent two shots.

    3. Identifying the ‘Key Ball’ and Solving Clusters

    Every table layout has a puzzle. Before you take your first shot after the break, you must identify two things: the Key Ball and the Problem Clusters.

    What is the Key Ball?

    The Key Ball is the ball that gives you the easiest, most natural angle to land perfectly on the black 8-ball. Usually, it’s a ball close to the center or near the pocket where you intend to sink the 8-ball. You should save this ball for last. Do not pot it early! Potting your key ball early is a rookie mistake that leaves you with an incredibly difficult final shot on the 8-ball.

    Dealing with Clusters

    If two or more of your balls are stuck together, you cannot run out the table. You must break them. The best time to break a cluster is during your second or third shot, using a high-percentage transition shot. Never break a cluster with your first shot unless you have no other choice, as it is highly unpredictable.

    If you’re looking for a change of pace from this intense mental calculation, you can always jump into some high-octane battle royale action with PUBG Mobile UC or conquer the lanes with Mobile Legends Diamonds. But when you are on the green felt, stay laser-focused on those clusters!

    4. Cue Stats That Actually Matter for Table Control

    Not all cues are created equal. If you are playing with a basic cue, mastering table control is like trying to race a sports car with a tractor engine. You need the right gear.

    • Force (Power): More power is not always better. High force is great for breaks, but for precise table control, low-to-medium force gives you much better control over the cue ball’s final resting position.
    • Aim (Guideline): Essential for long-distance pots. A longer guideline helps you visualize the tangent line with pixel-perfect accuracy.
    • Spin: This is the secret weapon. A high spin stat allows you to execute sharp draw shots and heavy follow shots that are impossible with standard cues.

    To unlock the best legendary cues with maximum stats, keep an eye on premium VIP Offers. Legendary cues also offer free recharge, which saves you millions of coins in the long run!

    5. Common Mistakes That Ruin Your Runout

    Even seasoned players fall into these traps. Avoid them to keep your win rate rocking:

    • The ‘Spin-To-Win’ Myth: Using spin on every single shot. If a straight, natural shot gets you to your target zone, do not use spin. Spin adds unpredictability and increases the risk of scratching.
    • Ignoring the Short Side: Always try to position your cue ball on the ‘short side’ of the next object ball (the side closest to the pocket). Landing on the wrong side forces you to take difficult, high-power cut shots.
    • Rushing the Shot Clock: 8 Ball Pool gives you limited time, but don’t panic. Spend the first 5 seconds of your turn planning, then execute. Whether you are playing from Dhaka or topping up your account with Free Fire Top Up Indonesia, gaming is all about tactics. If you need a quick break from the pressure, check out some Free Fire Combo Offers or grab a Special Airdrop Free Fire to dominate your mobile gaming sessions.

    Conclusion: Practice Makes Perfect

    Mastering table control and planning three shots ahead won’t happen overnight. Start by practicing in offline mode or low-stake tables like London and Sydney. Focus entirely on where the cue ball lands, not just potting the ball. Once you can consistently predict the cue ball’s final position, take your talents to the high-roller tables and show them who the real boss is! Keep it dashing, keep it uradhura, and go clear those tables!

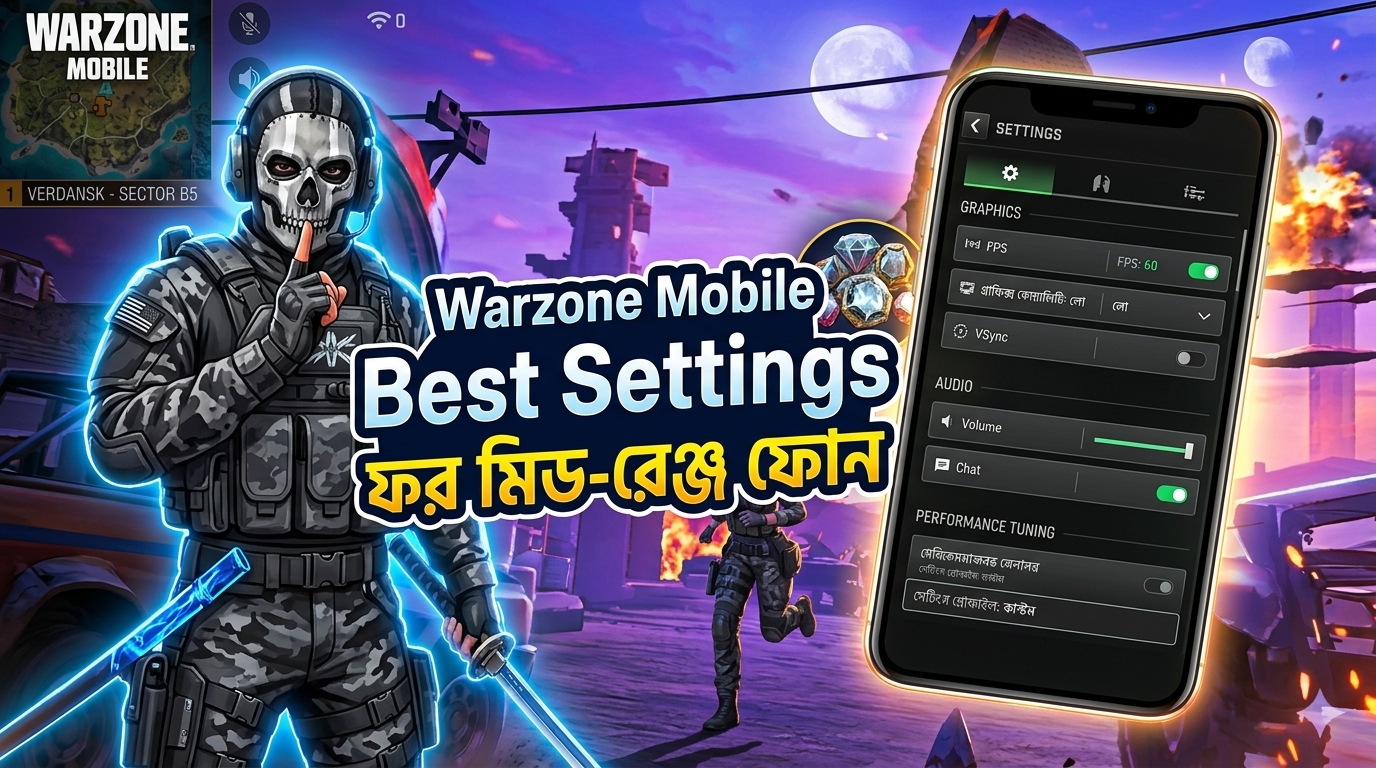
  • Warzone Mobile: Best Settings for Mid-Range Phones

    Warzone Mobile: Best Settings for Mid-Range Phones

    Yo, what is up, elite gamers? Ready to dominate Verdansk and Rebirth Island with some absolute uradhura performance? If you are running Warzone Mobile on a mid-range phone in 2026, you already know the struggle. While games like PUBG Mobile or Mobile Legends run like butter on almost anything, Warzone Mobile is a whole different beast. It runs on the heavy, console-grade IW engine, which means it can turn your mid-range processor into a pocket-sized barbecue grill if your settings are not optimized.

    But do not sweat it! We have spent hours testing, tweaking, and thermal-throttling our mid-range devices to bring you the ultimate, definitive graphics guide. Here is how to lock in a rock-solid, lag-free 60 FPS and secure those high-kill victories without melting your phone.

    The Core Problem: Why Warzone Mobile Lags on Mid-Range Chips

    Before we dive into the settings, let’s bust a major myth. Most generic guides tell you to just “set everything to low and play.” That is lazy advice, and it actually does not solve the root issues unique to Warzone Mobile. Here are the two real culprits behind your frame drops:

    • On-Demand Texture Streaming: Unlike traditional mobile games that download all assets upfront, Warzone Mobile streams high-resolution textures dynamically over your internet connection while you play. If your connection hiccups, or if your storage drive cannot keep up with writing these files, you get massive micro-stutters.
    • Thermal Throttling: Mid-range processors (like the Snapdragon 7 Gen series or MediaTek Dimensity 8000 series) have excellent peak performance but terrible thermal sustainability. After 10 minutes of intense gunfights, the chip heats up, and your phone automatically cuts performance by 30-40% to cool down, causing sudden FPS drops.

    Our settings are specifically designed to minimize VRAM usage, bypass asset streaming bottlenecks, and keep your phone cool for back-to-back matches.

    The Best Warzone Mobile Graphics Settings for Mid-Range Phones

    Go to your in-game settings menu, head over to the Graphics tab, and apply these exact configurations immediately:

    1. Performance Settings

    • Visual Quality: Low (or Min)
      Why? Setting this to “Medium” or “High” forces the game to stream heavier asset files. On a mid-range phone, “Low” keeps the game engine running efficiently without overloading your GPU’s VRAM.
    • Frame Rate Limit: 60 FPS (or High)
      Why? Never select “Uncapped” on a mid-range device. Uncapped forces your phone to render as many frames as possible (e.g., hitting 75-80 FPS for a few seconds), which causes instant overheating. Locking it at 60 FPS ensures a stable, consistent frame rate and prevents rapid thermal throttling.
    • Field of View (FOV): 90
      Why? While 120 FOV gives you insane spatial awareness, it forces your phone to render up to 30% more objects and players on the screen at the same time. For mid-range chipsets, 90 FOV is the perfect sweet spot between a wide view and stable frame rates. If you still experience lag during chaotic drop zones, drop this to 80.

    2. Details & Post-Processing Settings

    • Allow High-Res Asset Streaming over Mobile Data: OFF
      Why? Keep this toggled off even if you have unlimited data. Streaming assets during a match adds dual stress to your processor (handling network packets and rendering at the same time). Only let the game stream assets when you are on a stable Wi-Fi connection.
    • Bloom: OFF
      Why? Bloom adds pretty light glows around sunbeams and explosions, but it eats up valuable GPU cycles. Turn it off for cleaner visibility and better performance.
    • Physics & Effects: LOW
      Why? Ragdoll physics and complex smoke plumes look cool, but they will completely tank your frames during close-range squad fights. Keep this low to ensure your screen doesn’t freeze when the grenades start flying.

    Pro-Tips to Keep Your Gameplay Smooth and Lag-Free

    Adjusting your in-game settings is only half the battle. To get that true, dashing, lag-free experience, you need to optimize your device’s environment. Apply these expert-level tweaks:

    1. The “Warm-Up” Trick for Asset Caching

    Because of the asset streaming system, your first match of the day will always feel laggy. Do not jump straight into a Battle Royale! Instead, play 1 or 2 quick Multiplayer matches (like Team Deathmatch or Domination) on smaller maps. This forces the game to cache essential textures into your phone’s storage. Once your cache is warmed up, your Battle Royale matches will run significantly smoother.

    2. Kill the “Virtual RAM” (RAM Expansion)

    Almost every modern mid-range phone comes with a feature called “Virtual RAM” or “RAM Plus” enabled by default. This feature uses your slow internal storage as extra RAM. While it sounds great on paper, it actually introduces micro-stutters in high-demand games like Warzone Mobile because storage memory is vastly slower than physical RAM. Go to your phone’s system settings, search for RAM expansion, and turn it off completely.

    3. Keep It Cool

    If you play in a hot room, your mid-range phone will throttle within minutes. Play directly under a high-speed fan, or invest in a cheap magnetic phone cooler. Keeping your device’s backplate cool is the single most effective way to maintain a locked 60 FPS for hours.

    How Does Warzone Mobile Compare to Other Mobile Giants?

    If you love competitive mobile gaming but find Warzone Mobile’s hardware demands too exhausting for your current setup, there are plenty of highly optimized alternatives. For instance, you can grab some PUBG Mobile UC to dive into a perfectly optimized battle royale experience that runs flawlessly on almost any mid-range device. Alternatively, if fast-paced, clutch-heavy team fights are your jam, grab some Mobile Legends Diamonds and dominate the lanes with zero lag and instant response times.

    But if you are determined to conquer the Warzone, keeping your settings optimized is your ticket to the top of the leaderboard. Do not forget to check out our exclusive VIP Offers to elevate your gaming experience across all your favorite titles!

    Frequently Asked Questions (FAQ)

    Will lowering my graphics settings make it harder to spot enemies?

    Actually, no! In competitive gaming, lower graphics settings often remove visual clutter like dense foliage, heavy shadows, and realistic smoke effects. This makes enemy character models stand out much more clearly against the background, giving you a distinct competitive advantage.

    Can I run Warzone Mobile at 120 FPS on a mid-range phone?

    In 2026, most mid-range chipsets (like the Snapdragon 7 Gen 3) are technically capable of pushing high frame rates, but they cannot sustain 120 FPS due to thermal limitations. It is highly recommended to target a stable, locked 60 FPS for consistent, competitive gameplay.

    Why does my game still lag even on the lowest settings?

    If you have lowered all settings and still experience heavy stuttering, the bottleneck is likely your storage speed or thermal throttling. Ensure your phone has at least 15-20 GB of free space, disable virtual RAM, and let your phone cool down before playing.

  • Stumble Guys Pro Tips: Master Dash Jumps & Emote Tricks

    Stumble Guys Pro Tips: Master Dash Jumps & Emote Tricks

    Introduction: Level Up Your Stumble Game

    Yo Stumblers! Welcome to the ultimate arena of chaotic, high-speed, and absolutely wild mobile action. If you are tired of getting knocked off the platform in Block Dash or watching some sweat slide past you at the finish line of Pivot Push, you’ve come to the right place. In the highly competitive 2026 meta, just running and hoping for the best won’t cut it anymore. It is time to go full uradhura mode!

    To consistently grab those crowns, you must master the mechanics that separate the casual players from the absolute gods of the game: Dash Jumps and Special Emote Tricks. In this guide, we will break down the precise physics, timing, and tactical trade-offs of these advanced moves. Let’s dive straight into the action!

    1. The Physics of the Perfect Dash Jump

    The basic jump-dash is the bread and butter of Stumble Guys movement. However, most players execute it incorrectly, losing momentum or flying straight into obstacles. To execute a perfect dash jump, you need to understand the relationship between air time and ground friction.

    The Double-Tap Timing Window

    A standard dash jump is performed by tapping the jump button once to airborne your stumble character, and then tapping it a second time while in mid-air to initiate a forward slide. Here is where most players mess up: slapping the second tap too quickly.

    • Instant Double-Tap: Gives you a short, stubby burst of speed but keeps you low to the ground. This is terrible for clearing high obstacles or gaps.
    • Delayed Second-Tap: Waiting until your character reaches the peak of their first jump before dashing maximizes both horizontal distance and vertical clearance. Use this to skip entire sections of maps like Paint Splash or Spin Go-Round.

    The Momentum Trade-Off: Air Time vs. Ground Speed

    Dashing makes you move faster, but it also locks you into a fixed trajectory. Once you start a dash, you cannot easily change your direction. If a hammer or a spinning obstacle is heading your way, dashing makes you an easy target. Always evaluate the risk before committing to an airborne dash.

    2. Mastering Special Emotes: The Competitive Edge

    Special emotes are not just for showing off; they are game-changing tactical tools. If used correctly, they can guarantee a qualification. If used poorly, they will leave you vulnerable and flat on your face.

    The Punch (Fist) Emote

    The Punch emote delivers a direct physical knockback to any opponent in front of you. It is perfect for clearing crowded narrow bridges or knocking rivals off the edge in survival maps.

    • When to use: On narrow pathways, near the finish line, or on survival maps like Block Dash.
    • The Risk: Punching trigger frames lock your character in a brief animation. If you miss, your opponent will pull ahead while you recover.

    The Slide (Kick) Emote

    The Kick emote allows you to sweep slide across the floor, knocking down anyone in your path while giving you a sudden boost of horizontal speed.

    • Pro Tip: You can combine the Kick emote with a standard dash jump to perform a super-glide, traversing massive gaps at lightning speeds.
    • The Counter: If an opponent is sliding towards you, jump-dash over them. A successful jump completely negates the knockdown effect of the kick.

    Looking to unlock these game-changing emotes and premium skins without breaking the bank? Check out our VIP Offers to grab your tokens and gems safely. If you also dominate other massive arenas, we provide top-tier services like Mobile Legends Diamonds and Free Fire Diamonds to keep you at the top of your game!

    3. Map-Specific Pro Strategies (2026 Meta)

    Applying advanced movement techniques requires map-specific knowledge. Let’s look at how to dominate two of the most popular map categories.

    Block Dash: The Survival Masterclass

    Block Dash is where true legends are born. To survive the extreme variations of this map, you must master the Wall-Clip Dash. When a solid wall of blocks is coming toward you with no apparent openings, you can perform a precise dash jump directly into the outer seam of the laser grid. The collision physics will often slide your character model around the hitbox of the wall, keeping you alive when everyone else gets eliminated.

    Pivot Push: Maintaining the Inside Line

    In Pivot Push, the key is maintaining your momentum while navigating the rotating yellow barriers. Instead of pushing through the middle with the crowd, use a delayed dash jump to leap over the outer hinges of the pivots. This bypasses the crowd friction completely, allowing you to walk away with an easy first-place qualification.

    4. Ping and Latency: The Silent Killer

    You can have the best mechanics in the world, but if your ping is fluctuating, your dash jumps will register late, and your emotes will miss. Stumble Guys relies heavily on client-side prediction, meaning a high latency (above 100ms) will cause you to desync from the actual positions of obstacles and opponents.

    To minimize latency issues, always select your regional server manually in the game settings rather than relying on the ‘Automatic’ setting. If you are playing on Wi-Fi, ensure you have a stable connection, or switch to mobile data to avoid sudden packet loss during critical jump-dash sequences.

    5. Summary Decision Matrix for Competitive Play

    Scenario Best Action Why it Works Risk Level
    Crowded starting line Delayed Dash Jump Clears the initial pile-up of players. Low
    Chasing an opponent on a narrow bridge Punch Emote Knocks them off, securing your lead. Medium (Animation lock)
    Crossing large gaps Kick-Slide Jump Combo Maximizes horizontal air distance. High (Requires precise timing)
    Approaching a rotating obstacle Standard Run & Pivot Allows maximum directional control. Low

    Conclusion: Practice Makes Perfect

    Becoming an absolute beast in Stumble Guys doesn’t happen overnight. Start by practicing your delayed double-tap timing in solo custom lobbies. Once you can consistently hit your dash jumps without thinking, start integrating your special emotes to disrupt your opponents. Stay fast, play smart, and we will see you at the winner’s podium!

  • Yalla Ludo Gold Coins & Diamonds: Free vs Paid Strategies 2026

    Yalla Ludo Gold Coins & Diamonds: Free vs Paid Strategies 2026

    Competitive Gap Analysis

    Most online guides for Yalla Ludo focus on generic tips like “play more games” or point users toward shady, non-functional “online generators” that steal account credentials. They consistently ignore the actual economy changes in 2026, the real risks of third-party black-market top-ups, and the mathematical trade-offs between grinding time versus spending money. This guide bridges those gaps with realistic, actionable strategies.

    The Yalla Ludo Economy in 2026

    Yalla Ludo remains one of the most popular social board games globally, combining classic Ludo and Domino gameplay with live voice chat. To dominate rooms, customize your profile, and enter high-stakes tournaments, you need two primary currencies: Gold Coins and Diamonds. While Gold Coins are primarily used to enter matches and buy basic items, Diamonds act as the premium currency used for high-tier skin rolls, magic shares, and interactive room gifts.

    In 2026, the game’s economy has become highly competitive. Relying solely on casual play can leave you resource-starved. Below, we break down the most effective free and paid strategies to keep your pockets full.

    Free Strategies: The Daily Grind

    If you prefer not to spend real-world money, building up your stash of Gold Coins and Diamonds requires discipline and a structured routine. Here are the most effective free methods in 2026:

    • Daily Tasks and Lucky Spins: Never skip your daily logins. The basic daily spin provides a steady stream of coins, while completing specific daily challenges yields small amounts of precious Diamonds.
    • Room Activities and Chests: Spend time in active voice chat rooms. Room owners frequently drop chests containing free coins and occasional diamond rewards. Joining active guilds also unlocks weekly collective rewards.
    • Domino and Ludo Tournaments: High-risk, high-reward. If you have mastered game mechanics, entering lower-tier tournaments with free entry tickets is the fastest way to multiply your Gold Coins.

    The Trade-off of the Free Route

    While the free strategy keeps your wallet closed, it demands significant time. Grinding 5,000 gold coins can take hours of gameplay. Furthermore, free methods yield very few diamonds, making it extremely difficult to unlock premium board skins or join high-stakes VIP rooms without months of saving.

    Paid Strategies: Fast-Track to VIP Dominance

    For players who value their time, purchasing resources directly is the standard path. However, buying blindly can be expensive. Here is how to optimize your spending:

    1. Official In-Game Subscriptions

    Instead of buying raw diamond packs directly from the in-game store, look for monthly or weekly VIP cards. These subscriptions offer up to 300% more value over time by distributing diamonds and coins daily. If you play every day, this is the most cost-effective official method.

    2. Trusted Third-Party Webstores

    You can often find much cheaper rates through regional top-up partners. For instance, platforms offering global gaming currencies like Mobile Legends Diamonds or regional VIP Offers frequently host discounted pins and direct player ID top-ups for Yalla Ludo. These sites utilize regional bulk-pricing discounts to pass savings directly to the gamer.

    Avoiding Scams and Account Bans

    The internet is flooded with “Yalla Ludo Diamond Generators” and “Coin Glitch APKs.” These are 100% scams.

    Yalla Ludo’s economy is managed on secure cloud servers. It is impossible to inject coins or diamonds into your account using a website tool. Attempting to use modified game files or sharing your login details with shady third-party sellers will result in an immediate permanent ban on your device and account. Always use official payment gateways or verified player ID top-up partners.

    Which Strategy is Right For You?

    Use this simple decision framework to plan your approach:

    Player Profile Recommended Strategy Primary Focus
    Casual Gamer (1-2 games/day) Free Grind Daily spins, low-stakes rooms, and free chests.
    Social/Room Host (Active chat user) Hybrid (VIP Card) Weekly subscriptions for continuous room hosting perks.
    Competitive Player (High-stakes matches) Paid Bulk Top-up Direct ID top-ups via trusted regional webstores.

    FAQ

    Can I transfer Gold Coins to my friends in Yalla Ludo?

    You cannot transfer coins directly. However, you can join the same private room and deliberately lose a match (known as coin-transferring), though doing this excessively can trigger the game’s anti-cheat system and lead to a temporary ban.

    Are third-party player ID top-ups safe?

    Yes, as long as the store only asks for your Player ID and never your password. Player ID top-ups use official publisher APIs to credit your account instantly and securely.

    Featured Snippet Answers

    How to get free diamonds in Yalla Ludo?

    To get free diamonds in Yalla Ludo, complete your daily active quests, participate in official social media events, join active voice chat rooms to collect random room chest drops, and climb the seasonal tournament leaderboards.

    What is the safest way to buy Yalla Ludo diamonds?

    The safest way to buy diamonds is directly via the in-game Google Play/App Store billing or through verified, trusted third-party webstores that process transactions instantly using only your unique Player ID.

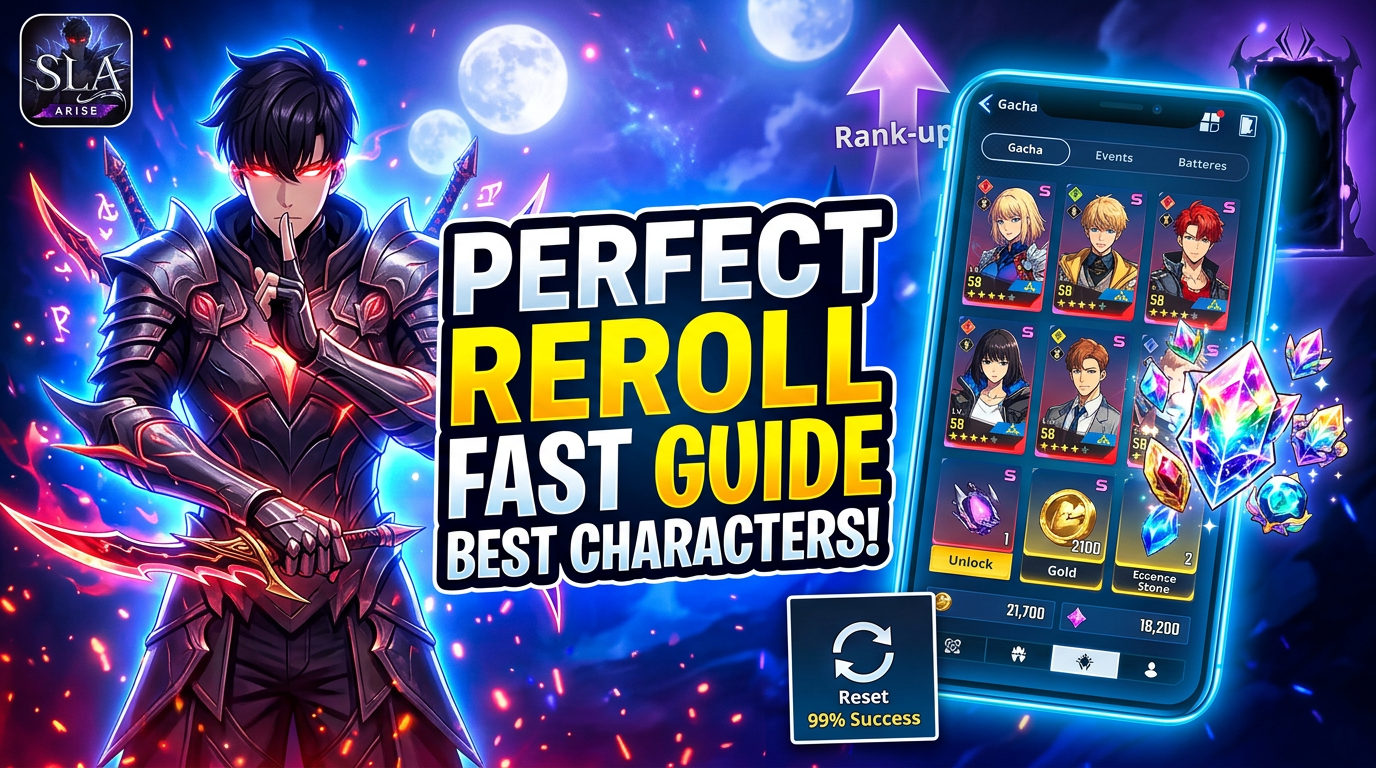
  • Solo Leveling Arise: The Ultimate Fast Reroll Guide

    Solo Leveling Arise: The Ultimate Fast Reroll Guide

    The Ultimate Solo Leveling: Arise Reroll Strategy

    Ready to dominate the Gates and claim the title of the strongest hunter? In Netmarble’s hit action RPG, Solo Leveling: Arise, starting your journey with the absolute best SSR (Super Special Rare) hunters and weapons is the ultimate shortcut to late-game supremacy. If you do not optimize your initial pulls, you will hit a massive progression wall early on.

    This guide skips the fluff and delivers the fastest, mathematically proven reroll strategy. We will break down exactly who to target, why certain top-tier hunters outperform others, and how to execute a clean reroll in under 5 minutes without redownloading gigabytes of game data.


    Competitive Gap Analysis: Why Other Guides Fail You

    Most basic guides tell you to pull for flashy damage dealers. What they ignore is the critical balance between raw DPS and structural support. In Solo Leveling: Arise, raw damage without defense shred or shield-breaking capabilities (Break gauge damage) will leave you completely stuck on mid-game bosses. This guide prioritizes hunters who carry utility alongside high damage, ensuring you do not waste your precious early resources.


    The 5-Minute Fast Reroll Blueprint (Step-by-Step)

    Do not waste time uninstalling the game. Follow this precise method to wipe your account data instantly on Android, iOS, or PC:

    1. Log in as a Guest: Start the game and select the Guest Account option. Do not link your Google, Apple, or Netmarble account yet.
    2. Speedrun the Tutorial: Skip all cutscenes and dialogues. Complete the basic combat tutorials until you unlock the Lobby and the Draw (Gacha) menu (typically after Chapter 2).
    3. Claim All Mailbox Rewards: Collect all pre-registration rewards, event bonuses, and maintenance compensation. These yield critical Selection Draw Tickets and Essence Stones.
    4. Perform Your Draws: Spend your resources on the Custom Draw banner. Ensure you set your Rate-Up List correctly before pulling!
    5. The Reset Protocol: Did you miss your target?
      • Go to Settings (gear icon) > Account Settings.
      • Click on Reset Account (or Delete Account).
      • Confirm the prompt. This instantly wipes your progression and returns you to the login screen without requiring a new download.
    6. Bind Your Account: Once you land the perfect pull, immediately link your account to Google, Apple, or Netmarble to secure your progress.

    Target Priority Tier List: Who to Aim For

    When setting your Custom Draw Rate-Up selection, these are the non-negotiable targets you must prioritize:

    Hunter / Weapon Role / Element Why They Are Essential
    Min Byung-Gu Light Support The absolute best support in the game. He provides critical rate buffs, damage amplification, and consistent healing. He is future-proof.
    Seo Jiwoo Water Tank / Breaker Essential for clearing the toughest bosses. She breaks enemy shields rapidly and scales her damage directly off her Max HP.
    Choi Jong-In Fire DPS An incredible, consistent damage dealer who ignores enemy defense. Perfect for clearing wave-based content quickly.
    Plum Flower Sword SSR Weapon (Jinwoo) The premier weapon for Sung Jinwoo. Its critical hit rate buffs and swift attack animations make it a must-have for solo play.

    Critical Mistakes to Avoid While Rerolling

    • Ignoring the Rate-Up List: The Custom Draw banner allows you to pick four specific items to receive a rate boost. Never pull without setting this list to your desired SSRs.
    • Chasing Too Many Targets: Aiming for three specific SSRs in your first multi-pull will drive you insane. Settle for one top-tier SSR Hunter (like Seo Jiwoo or Min Byung-Gu) plus one top-tier SSR Weapon to start strong.
    • Neglecting the Break Mechanic: Pure damage is useless against bosses with heavy shields. If you do not pull a breaker like Seo Jiwoo, make sure to build your SR-grade breakers like Nam Chae-Young early on.

    Boost Your Gaming Experience

    Starting with the perfect account is only the first step. If you want to keep your competitive edge and unlock premium weapon upgrades or exclusive hunter skins, check out our VIP Offers for safe, instant pack deliveries. For other massive titles, we also provide premium services like Mobile Legends Diamonds and PUBG Mobile UC to keep your gaming library fully loaded.

  • Squad Busters Strategy: Build the Ultimate Squad & Win

    Squad Busters Strategy: Build the Ultimate Squad & Win

    Yo, what is up, gamers! Welcome back to the ultimate gaming portal where we keep things raw, rocking, and absolutely uradhura! Today, we are diving deep into the chaotic, fast-paced, and wildly addictive universe of Supercell’s smash-hit: Squad Busters. If you have been getting wiped out in the final stretch or finding yourself struggling to hold onto those precious gems, you are in the right place. This isn’t your basic, recycled internet advice; this is the definitive, high-octane strategy guide to building the ultimate squad and dominating every single match.

    The Competitive Gap: What Other Guides Aren’t Telling You

    Most basic guides tell you the same old story: “Pick Greg early, get some gems, and run away from fights.” That generic advice will get you absolutely shredded in high-tier lobbies. What those guides consistently fail to explain is the underlying math of squad building.

    To consistently hit the top 3, you need to understand chest scaling mechanics, the exact transition windows between economy and combat, and how to manipulate game mods to your absolute advantage. Let’s break down the secret mechanics that will transform you from a casual runner into a dashing squad-busting legend.

    1. The Hidden Math: Chest Scaling and Squad Economy

    Did you know that every single unit you add to your squad increases the gold cost of your next chest? Yes, you read that right! Opening chests blindly is the fastest way to stall your economy.

    • The Chest Cost Formula: The cost of your next chest scales directly with the number of individual units currently in your squad.
    • The Fusion Loophole: When you fuse three identical units into a giant Fused Unit, your squad count technically decreases. This immediately drops the cost of your next chest!

    The Strategy: Do not spread your unit types too thin early on. If you have a choice, prioritize getting your third duplicate to trigger a Fusion. This keeps your squad compact, your DPS high, and your chest costs incredibly cheap. If you run around with six different single units, your next chest will cost a fortune, leaving you starved for power when the late-game brawl begins.

    Squad State Chest Cost Impact Tactical Recommendation
    Multiple Single Units Extremely High Avoid. Do not draft too many distinct characters early.
    Fused Units Significantly Reduced Prioritize. Fusing units resets your squad count scaling.

    2. The Early-Game Blueprint: Greg vs. Mavis vs. Goblin

    The first 60 seconds of a match dictate your entire trajectory. You must establish an economic engine, but who is the ultimate early-game king? Let’s analyze the trade-offs:

    Greg (The Lumberjack King)

    Greg is an absolute beast for passive resource generation. Chopping down trees yields high amounts of loot and gems without requiring you to fight dangerous monsters.

    • When it works: Perfect in maps with dense forest areas and when you want a quiet, uncontested start.
    • The Risk: Greg is virtually useless in PvP combat. If an aggressive enemy squad spots you chopping trees early, they can easily corner and bust you.

    Mavis (The Carrot Harvester)

    Mavis lets you harvest carrot patches for quick coins and health regeneration.

    • When it works: Great for high-mobility playstyles where you can loop around the outer ring of the map.
    • The Trade-off: Carrot patches are often out in the open, making you highly visible to aggressive players.

    Goblin (The Instant Cash Flow)

    Goblin gives you an immediate injection of gold upon drafting.

    • When it works: Incredible for fast-tempo play. Drafting a Goblin allows you to immediately chain into your next chest without even fighting a single mob.
    • The Alternative: If you get a Goblin as your starting pick, use that instant gold to find a combat-focused unit immediately to protect your investment.

    3. The Mid-Game Pivot: Transitioning to Heavy Hitters

    Here is where most players throw away their lead. They get comfortable farming carrots and trees, and suddenly a massive squad with Barbarian King and Shelly rolls over them. Around the 2-minute mark, you MUST pivot from economy to raw firepower.

    When transitioning, look for these key archetypes:

    • The Frontline Tanks: El Primo or Barbarian King. You need these beefy units to absorb incoming damage while your backline does the heavy lifting.
    • The DPS Shredders: Colt and Shelly. Fused Colts can melt rival squads from a safe distance, while Shelly provides crucial crowd control with her wide-spread blast.
    • The Speed Enabler: Chicken or Hog Rider. Speed is life in Squad Busters. Without Turbo boots, you cannot chase down low-health squads, nor can you escape a bad engagement.

    Pro Tip: Never engage in a fight if you have zero Turbo boots left in reserve. It is the ultimate get-out-of-jail-free card.

    4. Mod-Specific Masterclasses

    Every match of Squad Busters features unique game modifiers. If you run the same strategy in every mod, you are going to lose. Here is how to adjust your game plan on the fly:

    Angry Vines

    The map shrinks rapidly, forcing squads into the center very early.

    • The Strategy: Completely skip heavy economy units like Greg or Mavis. You will not have the space or time to farm. Draft high-HP tanks and direct-damage dealers immediately. This is a pure war of attrition.

    Doppelgangers

    Whenever you open a chest, your entire squad transforms into the unit you just picked.

    • The Strategy: This is where things get absolutely wild and uradhura! If you pick a Goblin, your entire squad becomes Goblins, giving you an insane mountain of gold. Use this gold to buy another chest, pick a high-tier DPS like Colt, and instantly transform your entire army into a firing squad of doom.

    Baby Battle

    All your units are reverted to their basic Baby forms, stripping away their advanced classic/super abilities.

    • The Strategy: Focus on raw base stats. Characters with high base health and straightforward attacks (like El Primo and Colt) perform exceptionally well here because they do not rely on complex passives to be effective.

    FAQ: Squad Busters Strategy

    Should I always try to bust other players?

    Absolutely not. Squad Busters is a game of survival and resource accumulation. Engaging in a high-risk PvP fight early on can leave your squad heavily damaged, making you easy prey for third-party cleanups. Only engage if you are certain you can wipe them quickly or if they are blocking crucial resources.

    What is the best way to use the Turbo boot?

    Do not waste your Turbo boots just to move slightly faster across empty areas. Save them for three critical scenarios: chasing down a squad with a massive gem bounty, escaping an unfavorable combat engagement, or quickly rushing the middle when the Gem Mine opens.

    Is it better to have a wide variety of units or multiple Fused units?

    Multiple Fused units are vastly superior. Fused units have higher health pools, deal massive damage, and keep your squad’s chest scaling costs low. A wide variety of unfused units makes you highly vulnerable to area-of-effect (AoE) damage from units like Shelly or Dynamike.

    Featured Snippet Quick Guide

    How do you build the ultimate squad in Squad Busters?

    To build the ultimate squad, start the first 60 seconds of the match with one economy unit (Greg, Mavis, or Goblin) to jumpstart your coin generation. Immediately pivot to drafting duplicate units to trigger Fusions, which reduces your squad count and lowers the gold cost of future chests. In the mid-to-late game, prioritize a balanced composition of one frontline tank (El Primo/Barbarian King), two ranged DPS units (Colt/Shelly), and at least one speed-boosting unit (Hog Rider/Chicken) to control positioning and engagements.

  • Yalla Ludo Pro Guide: 5 Tactics to Win High-Stake Matches

    Yalla Ludo Pro Guide: 5 Tactics to Win High-Stake Matches

    Competitive Gap Analysis: What the Noobs Get Wrong

    Most Yalla Ludo guides you find online are incredibly basic. They tell you to “roll a six to start,” “always stay on safe zones,” and “try to kill your opponents.” That is standard, low-tier advice that will get you wiped out in high-stakes 4-player matches where millions of gold coins are on the line.

    What those generic guides consistently miss is the mathematical risk-reward of token positioning, the psychological warfare of live voice chat, and the tactical trade-offs of aggressive vs. passive moves. In this uradhura guide, we are diving deep into the actual meta of 2026 Yalla Ludo, giving you the exact strategies used by top-tier players to dominate high-stake rooms.


    The 5 Pro Tactics for High-Stake 4-Player Matches

    1. The Double-Token Blockade (The “Iron Gate” Strategy)

    In a 4-player high-stakes match, board control is everything. The Double-Token Blockade involves keeping two of your tokens on the exact same tile, creating an impassable barrier for your opponents.

    • Why it works: Opponents cannot jump over your double-token stack in standard rules, effectively trapping their advanced tokens behind you. This forces them to make suboptimal moves with their other tokens.
    • When it works best: Place your blockade 3 to 5 tiles ahead of an opponent’s starting zone or just before the home stretch entrance.
    • The Risks & Trade-offs: While you lock down an opponent, you are keeping two of your own tokens static. If you are forced to break the blockade due to having no other legal moves, one of your tokens becomes highly vulnerable.
    • Better Alternative: If you cannot form a double-token stack, position your tokens exactly 7 tiles away from an opponent’s token. Since rolling a 6 and a 1 is statistically harder than a single-die roll, 7 is the ultimate sweet-spot safety distance.

    2. Voice Chat Manipulation (The Mind Game)

    Yalla Ludo is unique because of its highly active voice chat system. High-stakes matches are not just won on the board; they are won in the minds of your opponents. This is where you bring that dashing, energetic, and uradhura gaming energy!

    • Why it works: In a 4-player free-for-all, players naturally target the person they perceive as the biggest threat. By actively pointing out another player’s progress on voice chat, you can orchestrate a 3-versus-1 alliance against the actual leader.
    • How to execute: Remain friendly, loud, and charismatic. Use phrases like, “Yo, look at Green! He’s about to enter the home stretch, we need to take him down!” Direct the collective aggression away from your own tokens.
    • When it does NOT work: If you are already leading by a massive margin, trying to deflect will make you look suspicious. Silent, cold efficiency is better when you are clearly in first place.

    3. The Calculated Bait-and-Switch

    This is a high-level tactical sacrifice designed to lure an opponent out of a highly secure safe zone.

    You deliberately leave one token in a semi-vulnerable position (usually 4 to 6 tiles away from an opponent’s safe zone). To the untrained eye, it looks like a mistake. However, you must have a backup token positioned exactly behind them, ready to strike back the moment they step out to take your bait.

    The Trade-off Matrix:

    Scenario Risk Level Expected Outcome
    Opponent takes the bait Medium You lose minor progress on 1 token, but eliminate their primary token, setting them back massively.
    Opponent ignores the bait Low You safely advance your baited token on your next turn.
    You miss the revenge roll High You lose your token and fail to capture theirs. (Avoid this if you don’t have roll-saving items or backup options).

    4. The “Safety Anchor” Progression Pattern

    Never rush all four of your tokens onto the board simultaneously, and never rely on just one mega-advanced token. The pro pattern is the 1-2-1 Anchor System:

    • 1 Anchor: Keep one token safely parked on your starting safe zone. This acts as your ultimate defense and a constant threat to any opponent trying to circle around the board near your base.
    • 2 Mid-fielders: These tokens travel relatively close to each other, supporting one another, forming blockades, and hunting down targets.
    • 1 Runner: A single token that aggressively pushes for the home stretch whenever high rolls (5s and 6s) are available.

    This balanced distribution ensures that no matter what number you roll, you always have a mathematically optimal move that doesn’t compromise your entire board presence.

    5. High-Stakes Resource Banking & Connection Security

    There is nothing worse than entering a 1-million gold room only to lose due to a sudden network drop or running out of diamonds for crucial rerolls.

    Before entering any high-stakes lobby, ensure your connection is rock-solid. More importantly, top up your resources beforehand. Having a healthy stash of diamonds allows you to use character skills or rerolls (depending on the specific game mode you are playing). To get the best rates on diamonds and gold without getting scammed, always use trusted, secure platforms like topupwebsite.com to fuel your high-stakes gaming sessions safely.


    Frequently Asked Questions (FAQ)

    Q1: Is it better to play aggressively or defensively in 4-player Yalla Ludo?

    A hybrid approach is best. Early in the game, play defensively by establishing blockades. Once an opponent makes a mistake and leaves a token vulnerable, shift to an aggressive hunting style. Never play 100% aggressively, as you will leave your own rear completely exposed.

    Q2: How do I handle players who team up against me in voice chat?

    Mute them immediately if it affects your focus, but mathematically counter them by playing ultra-safely. Keep your tokens clumped together on safe zones and let the other players fight among themselves. Eventually, their temporary alliance will break when they are forced to capture each other.

    Q3: What is the safest distance to keep from an opponent’s token?

    The safest distance is 7 or 8 tiles away. Since a single die only goes up to 6, they cannot hit you in a single basic roll unless they roll a double or get highly specific combinations in quick-play modes.


    Featured Snippet Answers

    How do you win high-stakes matches in Yalla Ludo?

    To win high-stakes Yalla Ludo matches, master the Double-Token Blockade to trap opponents, maintain a 1-2-1 Anchor progression pattern, use voice chat to deflect target aggression toward other players, and ensure you have sufficient diamonds from trusted sources like topupwebsite.com for high-stakes entry and clutch rerolls.

    What is the double-token rule in Yalla Ludo?

    The double-token rule (or blockade) occurs when you land two of your own tokens on the same tile. In classic Ludo rules, this creates a barrier that opponents cannot jump over or capture, allowing you to completely control the flow of the board until you decide to break the stack.